NixOS: On Raspberry Pi 3B
Contents
Hardware come and hardware go. About one year ago I moved my Home Manager setup
from a Raspberry PI 3 Model B to an Intel NUC Core i3. After that migration
my poor Raspberry Pi has been laying on a shelf, collecting dust.
Even a decommissioned Raspberry Pi could have some utility running on the home network. With some time to spare, last weekend seemed like the weekend for building RPi images. To get going quickly it’s possible to download pre-built NixOS SD card images from Hydra. Guaranteed to save me a lot of time, that was naturally not the path I chose. I wanted to build the image and machine configuration myself, because why not1.
Building
The Raspberry Pi is quite a limited system when it comes to computing resources and you don’t really want to find yourself building much to any software on it natively. Instead it would be great to save some grief by building the configuration on a more powerful machine.
The configuration required to build a NixOS SD card image for the Raspberry Pi
turned out to be really short and sweet. Here’s a minimal nixosConfigurations
entry where a system configuration includes the necessary module to build SD
card ISO images:
{
  description = "NixOS Raspberry Pi configuration flake";
  outputs = { self, nixpkgs }: {
    nixosConfigurations.rpi = nixpkgs.lib.nixosSystem {
      system = "aarch64-linux";
      modules = [
        "${nixpkgs}/nixos/modules/installer/sd-card/sd-image-aarch64.nix"
        { config.system.stateVersion = "22.05"; }
      ];
    };
  };
}
I pretty much exclusively use nix flakes these days. The configuration above,
as its description hints at, is a flake. This doesn’t mean that building NixOS
for Raspberry Pi cannot be done without flakes. I will only include flake
instructions in this post because I haven’t tried the alternatives.
I included a “crash course”, if you will, in flakes in NixOS: The Ultimate Dev Environment?, but there are several introductions to flakes popping up in blogs and wikis.
In fact, these days I frequently find things I would assume to be “tricky”,
“advanced” or “hacky” on other distros to be really elegant on NixOS. I’ve
come to conclude that not only is NixOS awesome because of how its
declarative, pure and composable nature result in highly reproducible builds and
configurations, but more often than not people have managed to hide complex
tasks behind elegant abstractions. I’m sure it’s a combination of the
environment enabling and encouraging the smart people working on NixOS to
easily build simple interfaces.
And on the flip side of that, I have full sympathy for all beginners to nix,
clawing their way up the rocky cliff towards the fabled lighthouse of hope of
eternal declarative reproducible software bliss.
The SD image attribute path
The SD card image derivation can be found under the following property in the flake configuration hierarchy:
nixosConfigurations.rpi.config.system.build.sdImageWhile creating this configuration is trivial, chances are building it is not as simple as invoking:
nix build .#nixosConfigurations.rpi.config.system.build.sdImageMost likely - depending on your build machine’s architecture - nix will greet
you with an error message similar to the following2:
error: a 'aarch64-linux' with features {} is required to build
    '/nix/store/m9l1cvifh44nl7fscp7mjbl7qv88478g-stage-2-init.sh.drv',
    but I am a 'x86_64-linux' with features {benchmark, big-parallel, kvm, nixos-test}
Cross-compiling
This section reached a dead end for the time being. Skip on to the next section if this isn’t relevant to you.
The Raspberry Pi 3 is an ARM chip, requiring binaries targeting aarch64. As
with the full SD image NixOS Hydra builds nixpkgs for aarch64-linux (and
Apple aarch64-darwin). The binary cache on cache.nixos.org helps greatly
speeding up the image generation as most stock derivations would be already
built.
I use x86_64 machines exclusively (besides this one R-Pi). This poses the
challenge of cross-compilation if I want to build the R-Pi SD card image. There
are several options listed on the NixOS wiki’s ARM section for how to “natively”
build the images.
The NixOS Wiki has a brief section on how to do native cross compilation setting
nixpkgs.crossSystem.system to aarch64-linux. The nixpkgs sources for
crossSystem states themselves, this is kind of a nonsensical settings. Why?
Because (pure, as in isolated builds) cross-compilation requires at least two
(or three) system architectures:
- The build host’s architecture, on which the toolchain is built and run.
- The host machine’s architecture, which is the target binary format of the build process and where the binaries will eventually run.
- The target machine’s architecture, which is more related to toolchain build and compatibility.
Given this, the following snippet from the NixOS Wiki seems to be outdated and
didn’t really work all that well:
{ ... }: {
  nixpkgs.crossSystem.system = "aarch64-linux";
}
The resulting toolchain did not seem to provide proper NixOS-style wrapped
binaries and several toolchain paths (like typical system includes) and linker
paths were broken.
Particularly, with flakes, the build (local) machine architecture shouldn’t be
inferred from the system for the sake of purity. Rather, what seemed to have a
lot more success in kicking off the (native) cross-compilation build of the SD
card image was the following nixpkgs settings:
{ ... }: {
  nixpkgs.buildPlatform.system = "x86_64-linux";
  nixpkgs.hostPlatform.system = "aarch64-linux";
}
This resulted in better cache hits from the NixOS cache and many packages started building, saturating my machine’s CPUs with parallel builds. Sweet!
Unfortunately, while the cross-compilation of the aarch64 Linux kernel purred
away through the build, the simultaneous build of samba failed due to missing
headers. I did spent a wee bit of time trying to figure out why the #ifdef
including crypt.h was set when waf listed it as missing in the configure
step, but eventually I didn’t want to spend more time than necessary on this yak
shave:
error: builder for '/nix/store/khs4kyxqa7gkd6wvg467d6a5s084zb7p-samba-aarch64-unknown-linux-gnu-4.15.9.drv' failed with exit code 1;
       last 10 log lines:
       > [2095/3718] Compiling libcli/named_pipe_auth/npa_tstream.c
       > In file included from ../../lib/talloc/pytalloc_util.c:25:
       > ../../lib/replace/replace.h:885:10: fatal error: crypt.h: No such file or directory
       >   885 | #include <crypt.h>
       >       |          ^~~~~~~~~
       > compilation terminated.
       >
       > Waf: Leaving directory `/build/samba-4.15.9/bin/default'
       > Build failed
       >  -> task in 'pytalloc-util.cpython-310-aarch64-linux-gnu.objlist' failed with exit status 1 (run with -v to display more information)
       For full logs, run 'nix log /nix/store/khs4kyxqa7gkd6wvg467d6a5s084zb7p-samba-aarch64-unknown-linux-gnu-4.15.9.drv'.
In the end the native cross-compilation was looking promising, but at the end of the day I left it at that.
Registering QEmu emulation as a binfmt wrapper
As an alternative to native cross-compilation it’s also possible to compile for
aarch64 registering QEmu emulation as a binfmt wrapper. This can easily be
done by adding this single definition to the build machine’s NixOS
configuration:
{
  boot.binfmt.emulatedSystems = [ "aarch64-linux" ];
}
After a nixos-rebuild test the local machine should now be able to run
binaries built for aarch64 and thus the tools required to build the NixOS
configuration for the R-Pi SD images. I’ve tested this from both native NixOS
on x86_64 and on NixOS running in WSL. Both worked great.
Now, one of the reasons for investing some effort into native cross-compilation
is that emulation is significantly slower than any native counterpart. As part
of my configuration I have e.g. some Haskell utlities that require compilation.
Haskell isn’t exactly known for its ludicrous compilation speeds and
overlooking the emulated GHC grind through each source file was like watching
paint dry.
Customization
The image build from the configurations already shown will not contain any
customizations. It would be a stock NixOS image, identical to the installers
built by Hydra.
Wouldn’t it be great if we could customize the configuration and have that
configuration be what we flash to the SD card without having to do any further
nixos-rebuild commands after booting the R-Pi?
But of course, we’re talking about NixOS here after all! Here’s an incomplete
example configuration illustrating various “configuration points” within the
flake structure. The R-Pi image is basically nothing more special than a regular
NixOS configuration, and thus it’s possible to pull in any existing NixOS
configuration or module into this config:
{
  description = "NixOS Raspberry Pi configuration flake";
  outputs = { self, nixpkgs }: {
    nixosConfigurations.rpi = nixpkgs.lib.nixosSystem {
      system = "aarch64-linux";
      modules = [
        # SD card image
        "${nixpkgs}/nixos/modules/installer/sd-card/sd-image-aarch64.nix"

        # Additional NixOS modules, like Home Manager or personal modules
        home-manager.nixosModules.home-manager
        ./some/presonal/module.nix

        # Inline configuration here
        ({ ... }: {
          config = {
            # ...like <hostname>
            networking.hostName = "bringebær-pai";
            system.stateVersion = "22.05";
          };
        })
      ];
    };
  };
}
In the case of my dotfiles I do have some abstractions over
nixpkgs.lib.nixosSystem which builds configurations with some default modules
based on my dotfile repository structure. I gave a walkthrough of this
configuration in my previous post: NixOS: Confederation.
C.mpr.ss..n
By default, the SD image ISO is compressed using zstd. This is a
reasonable default as it saves a significant amount of disk space:
nix-repl> :lf .
Added 8 variables.

nix-repl> :p nixosConfigurations.rpi.config.system.build.sdImage.compressImage
true
The image can be decompressed using the following command:
$ nix shell nixpkgs#zstd -c unzstd -o nixos.img ./result/sd-image/<name>.img.zstNo compression
With all my customizations and additional tools the image size is considerably
bigger than the default. Expect that compressing the resulting .img using
zstd takes quite a bit of time. Since I was intending on only building the SD
image once, I skipped the zstd by setting
config.system.build.sdImage.compressImage = false:
{
  description = "NixOS Raspberry Pi configuration flake";
  outputs = { self, nixpkgs }: {
    nixosConfigurations.rpi = nixpkgs.lib.nixosSystem {
      system = "aarch64-linux";
      modules = [
        "${nixpkgs}/nixos/modules/installer/sd-card/sd-image-aarch64.nix"
        {
          config = {
            system = {
              # Disable zstd compression
              build.sdImage.compressImage = false;

              # ... other configs

              stateVersion = "22.05";
            };
          };
        }
      ];
    };
  };
}
If you’re building many of these configurations with slight changes keep in mind
that each build will result in a complete new ISO image in the nix store.
This will quickly exhaust your disk, so either keep compression on or make
sure to nix-collect-garbage on occasion.
Surely enough, in the end the SD image was built and ready to be flashed onto a
real SD card. Without concern of stripping down the configuration to bare
minimums my image containing all my headless customizations and tools take close
to 9GB of disk space. A minimal installation ends up somewhere around 2.5GB.
❯ ls -lh result/sd-image/
total 8.7G
-r--r--r-- 1 root root 8.7G Jan  1  1970 nixos-sd-image-22.11.20221031.d40fea9-aarch64-linux.img
Flashing the SD card
After plugging the SD card into the build machine there are several ways to
figure out which device it ends up being assigned. Personally I just use dmesg
or dmesg --follow for this, which provides some fairly obvious output:
[1514026.420241] mmc0: new ultra high speed SDR50 SDHC card at address e624
[1514026.420557] mmcblk0: mmc0:e624 AALCD 29.7 GiB
[1514026.425039]  mmcblk0: p1 p2
This means that the SD card device to use in the following commands would be
/dev/mmcblk0.
It’s important to be 100% sure to find the correct device. Using the dd
command it’s notoriously simple to start copying bytes over to the wrong device
and rendering it useless, as a poor coworker of mine once had the displeasure of
experiencing.
One alternative to dmesg is to use lsblk, for which I don’t currently have
any example output containing the SD card:
❯ lsblk
NAME           MAJ:MIN RM   SIZE RO TYPE  MOUNTPOINTS
nvme0n1        259:0    0 476.9G  0 disk
├─nvme0n1p1    259:1    0   511M  0 part  /boot
└─nvme0n1p2    259:2    0 476.4G  0 part
  └─root       254:0    0 476.4G  0 crypt
    ├─vg-swap  254:1    0    16G  0 lvm   [SWAP]
    └─vg-nixos 254:2    0 460.4G  0 lvm   /nix/store
                                          /
Having gathered all pieces of information it should now be time to copy over the
image to the SD card device. This can be done using the dd command, specifying
the SD card image as the if (input file) and the device path as the of
(output file).
sudo dd \
    if=result/sd-image/nixos-sd-image-22.11.20221031.d40fea9-aarch64-linux.img \
    of=/dev/mmcblk0 \
    status=progress \
    bs=4M
Booting
Power issues
The NixOS wiki warns about power issues related specifically to the R-Pi 3:
Especially with the power-hungry Raspberry Pi 3, it is important to have a sufficient enough power supply or weirdness may happen.
And surely enough, weirdness ensued.
I don’t quite remember what I used to power the R-Pi previously, but this time
around I was using some regular USB adapters I had laying around. The R-Pi
seemed to start up exactly as it should and once I had the SD image ready I was
presented with the NixOS boot process and all seemed well. Power being an
issue wasn’t in my mind at this point.
However, at some point during “Stage 2” of the boot process, everything went black and the R-Pi eventually entered a cyclic boot. This seemed to consistently happen right when the kernel changes or updates the framebuffer resolution and/or fonts (or whatever happens with that regular boot-time “flicker”). For the first couple of reboots I thought I might have mistakenly setup an X server on my image, and now the X server was causing some panic or whatever right when it was starting. Naturally my first though was that I had somehow messed up the image and it was corrupt in one way or another. To eliminate personal fuckups my first attempt at fixing this issue was to double check that one of the pre-built images managed to get me to the login prompt.
No such luck.
The same blackout then reboot happened in exactly the same way with the pre-built SD image. At this point I had spent quite a bit of time on this project and was feeling tired. Building images, flashing SD cards and booting Raspberry Pis has a long feedback loop, particularly with large images and slow SD card bandwidths. Not knowing which wild goose to chase it killed my spirit to push on. Better take a break!
A few days passed, but I eventually felt revigorated and came back with a fresh
mind. I started by re-reading the NixOS Wiki on Raspberry Pi, and surely
enough I was reminded of the importance of providing the R-Pi with sufficient,
stable power.
Switching out the random USB adapter with something capable of consistently
serving up to 2A of 5V seemed to get me to the long awaited login prompt on
tty1.
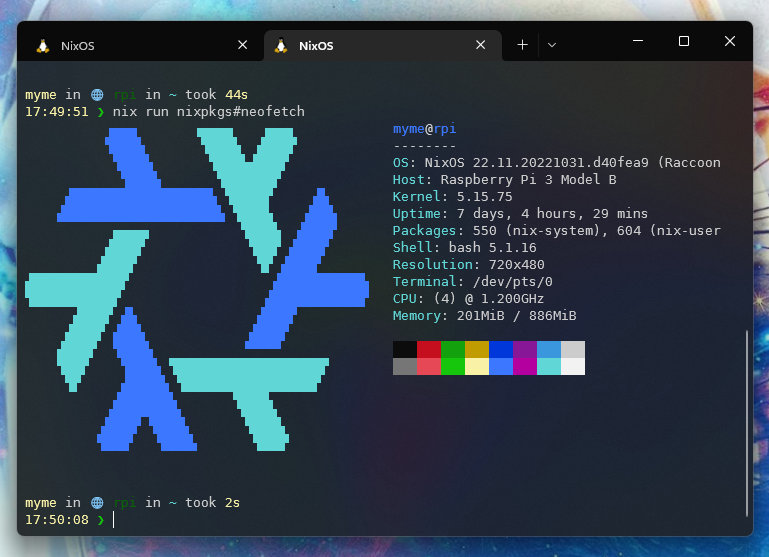
Great success! However, logging in I did not see my familiar starship prompt,
but rather a more stock bash prompt reminding me that I pulled all my configs
from the SD image to rule out any personal settings messing up the boot process.
After another few iterations of rebuilding and reflashing the SD card -
eventually growing the image to a (not so modest) 9 GB from the stripped down
2.5 GB of the plain image - I was able to log in to a system that felt like
$HOME.
Remote deployment
Building the SD card image with all our customizations and tweaks saved us a ton
of time. Once the R-Pi is up running we can’t keep re-flashing the SD card
whenever we want to update our software. It’s of course possible copy over the
configuration to the R-Pi, ssh in and issue nixos-rebuild switch there, but
building my configuration itself the Raspberry Pi wouldn’t have finished by
Christmas.
It’s much more desirable to keep using remote building and rather copy over all the store paths required for the new NixOS generation over to the R-Pi once they’re built. There are a few hurdles to overcome first before making that a reality.
Generating nix cache keys
In order for remote systems to accept derivations built on other machines they
have to be signed in the nix store of the build machine or through the nix
cache server. Generating a key is quite simple, following the steps on
Distributed build or Binary Cache over at the NixOS Wiki:
$ nix-store --generate-binary-cache-key builder-name cache-priv-key.pem cache-pub-key.pem
This is using the “legacy”3 nix-store command. There might be an entry
into cache key generation using nix store or similar, but I have neither
looked nor stumbled over it.
Most people who’ve used nix for any significant time should be familiar with
seeing pre-built store paths pulled down from cache.nixos.org. It’s also
possible to use other caches (substitutors) like cachix or serving up a nix
store directly from the local machine using e.g. nix-serve (or any of its many
compatible clones).
As a security mechanism nix doesn’t allow using pre-built store paths from
random hosts. To ensure that a path has been built by a trusted remote nix
allows signing store paths. By default, nix is configured to trust the key
used by Hydra:
❯ grep trusted-public-keys /etc/nix/nix.conf
trusted-public-keys = cache.nixos.org-1:6NCHdD59X431o0gWypbMrAURkbJ16ZPMQFGspcDShjY=
It’s possible to have nix sign all store paths that are built locally using a
given private key. This can be done by adding the private key to
/etc/nix/nix.conf:
secret-key-files <path-to-key>.pem
It’s also possible to sign all existing store paths after the fact:
$ nix store sign --all --key-file cache-priv-key.pem
Instead of explicitly signing store paths on the local machine it’s possible
(and perhaps preferable) to sign the store paths when they are served through
servers like nix-serve. In which case you shouldn’t invoke the command above
or add the secret-key-files to /etc/nix/nix.conf.
🚀 deploy-rs
I haven’t been doing much of my own nix caching outside of simple experiments
and using the cachix-action in GitHub workflows. The tool I chose to use for
this was deploy-rs. It allows checking, building and deploying NixOS
configurations to remote systems while also having some nice bells and whistles
like automatic rollback on failure.
{
description = "NixOS Raspberry Pi configuration flake";
inputs = {
# Add deploy-rs as Flake input from GitHub
deploy-rs.url = "github:serokell/deploy-rs";
nixpkgs.url = "github:NixOS/nixpkgs/nixos-22.05";
};
outputs = { self, deploy-rs, nixpkgs }: {
nixosConfigurations.rpi = nixpkgs.lib.nixosSystem {
system = "aarch64-linux";
modules = [
# NixOS config
# ...
];
};
# deploy-rs node configuration
deploy.nodes.rpi = {
hostname = "192.168.1.7";
profiles.system = {
sshUser = "myme";
sshOpts = [ "-t" ];
magicRollback = false;
path =
deploy-rs.lib.aarch64-linux.activate.nixos
self.nixosConfigurations.rpi;
user = "root";
};
};
};
}I currently have disabled the magicRollback and require some additional ssh
options in order for sudo to work well remotely on the R-Pi. There might be
ways around this, but I haven’t really spent much time on it.
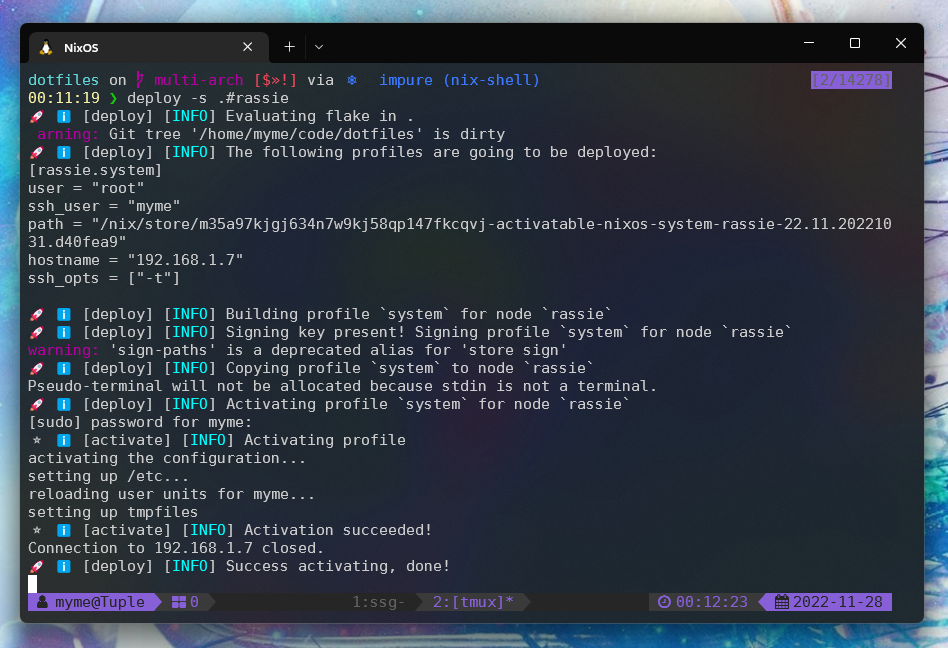
Once the deploy-rs configuration is in place the time has come for testing our
first remote deployment. First we need to tell deploy-rs about our cache key
before we can start the actual deploy step. This is just defining a LOCAL_KEY
environment variable. Then running deploy with either zero arguments (defaults
to all defined nodes) or with a flake path to a specific node:
$ export LOCAL_KEY=/var/nix/cache-priv-key.pem
$ deploy .#rpi
For generations to come!
Once the deploy-rs deployment succeeds it’s possible to list the NixOS
generations on the R-Pi to see that we’re indeed able to activate new
generations remotely.
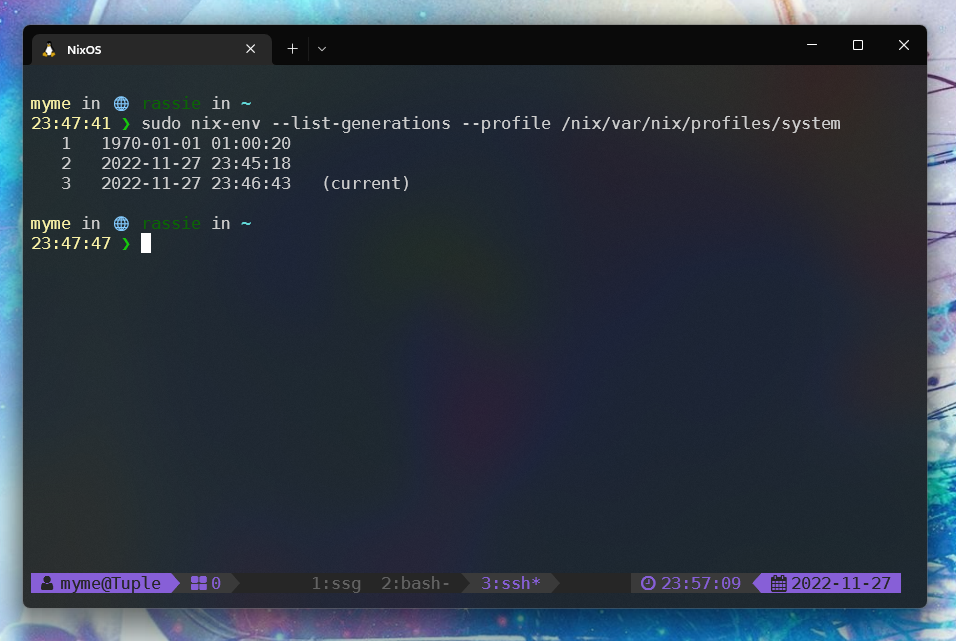
See how the first generation running directly from the built SD image is from
POSIX epoch.
Rounding off
So, what did we do?
- Configured our build host to emulate
aarch64for building binaries for the Raspberry Pi. - Added our
NixOScustomizations to the minimal Raspberry Pi SD card configuration. - Built the SD card image and copied it over to a physical card.
- Booted the Raspberry Pi (with sufficient power) into a batteries included
NixOSinstallation. - Set up our build machine with a
nix storecache key. - Configured
deploy-rswith our Raspberry Pi as a node. - Successfully deployed
NixOSto the Raspberry Pi 🚀
There are probably tons of things I can improve with this process, but at least it’s at the point where this is working smoothly.
Now I just need to find something to use this aging R-Pi for!
I’d like to thank @martiert for keeping his NixOS configurations repo publicly available for inspiration and little tricks that got this all working for me.
Footnotes
Actually there is a great benefit in building SD images yourself. As the post later goes on to explain, it’s possible to build your entire
NixOSconfiguration and flash it to an SD card from a much more powerful computer. This allows to sidestep any building or installation process on the resource limited Raspberry Pi.↩︎Newlines added for readability.↩︎
Not really legacy, but I’ve been using the
nixcommand for so long it’s starting to feel a lot like it.↩︎