NixOS: Headless Home Assistant VM
Contents
This post is based off the notes I made while setting up Home Assistant in a
virtual machine running the Home Assistant OS image on an Intel NUC i3. My
existing setup was running on a Raspberry Pi 3 which was starting to feel a
bit sluggish while also using a somewhat unsupported manual docker setup. The
full Home Assistant OS manages upgrades and would hopefully simplify management
and backups.
At least that was the idea…
There was quite a bit of trial, error and frustration getting this setup the way I wanted. Finding the combination of resources that I was after was scarce which is why I wanted to share my notes on the setup. I’m not yet done migrating settings over and so the post does not cover migration or in fact much Home Assistant specific setup at all. Bringing up a decent virtualized environment turned out to be enough material in itself.
NixOS virtualization
I want to stow the NUC away out of sight and primary manage it from the
command line. The host hypervisor is a fairly minimal NixOS installation and I
see no reason to setup a display server on it. That also includes managing the
guest VMs through the command line instead of graphical tools like
virt-manager. VMs are managed by libvirtd and while some configuration is
done through the virsh shell the setup also uses some of the auxiliary tools
from the virt-manager package.
Most of the NixOS configuration is plain standard stuff, but a few libvirtd
options must be enabled:
# /etc/nixos/configuration.nix
virtualisation = {
  libvirtd = {
    enable = true;
    # Used for UEFI boot of Home Assistant OS guest image
    qemuOvmf = true;
  };
};

environment.systemPackages = with pkgs; [
  # For virt-install
  virt-manager

  # For lsusb
  usbutils
];

# Access to libvirtd
users.users.myme = {
  extraGroups = ["libvirtd"];
};
Bridged network host setup
The Home Assistant VM needs to talk to various devices within the home which is why it should also be on the same network as the home devices. Most virtualizers default to use NAT-based networks which means that some configuration is to be expected in order to expose the virtual network interface to the external local network.
With the luxury of multiple network cards a machine can dedicate one directly to
the guest VM, simplifying the network configuration of the host. The NUC,
however, only has a single network interface, not counting the WiFi adapter.
This means that the physical network adapter must be shared between the host and
the guest by allowing the guest to expose its virtual network adapter as if it
was a physical one. A bridged network setup is what’s commonly used for this
scenario.
NixOS configuration
The NixOS configuration exposes options to define bridge interfaces. The
following snippet from configuration.nix defines a bridge interface br0 and
binds a static IP to it. This bridge device should be connected to the physical
interface (e.g. eno1) through networking.bridges:
# /etc/nixos/configuration.nix
networking.defaultGateway = "10.0.0.1";
networking.bridges.br0.interfaces = ["eno1"];
networking.interfaces.br0 = {
  useDHCP = false;
  ipv4.addresses = [{
    "address" = "10.0.0.5";
    "prefixLength" = 24;
  }];
};
Once the configuration is applied ip addr show would list something similar to
the following:
❯ ip a
1: lo: <LOOPBACK,UP,LOWER_UP> mtu 65536 qdisc noqueue state UNKNOWN group default qlen 1000
    link/loopback 00:00:00:00:00:00 brd 00:00:00:00:00:00
    inet 127.0.0.1/8 scope host lo
       valid_lft forever preferred_lft forever
2: eno1: <BROADCAST,MULTICAST,UP,LOWER_UP> mtu 1500 qdisc fq_codel master br0 state UP group default qlen 1000
    link/ether 1c:69:7a:ab:e7:ae brd ff:ff:ff:ff:ff:ff
3: br0: <BROADCAST,MULTICAST,UP,LOWER_UP> mtu 1500 qdisc noqueue state UP group default qlen 1000
    link/ether 1c:69:7a:ab:e7:ae brd ff:ff:ff:ff:ff:ff
    inet 10.0.0.5/24 scope global br0
       valid_lft forever preferred_lft forever
There we see both the physical eno1 interface and the br0 bridge.
Configure a libvirt bridged network with virsh
Once the host network has been configured the way we want it a virtual network
must be configured for the guest to use later. I don’t think I’ve ever used
libvirt before and besides having used VirutalBox and VMWare extensively
for work-related VMs I’ve only occasionally done simple manual qemu launches
when streamlining e.g. a NixOS bring-up. When not using GUI tools like
virt-manager it seems like virsh is the Swiss army knife in the world of
libvirt.
I was not prepared for what hit me when I first invoked help in the virsh
prompt…
Luckily a bit DuckDuckGo-fu got me well enough through the maze of virsh
sub-commands.
Several elements exposed through virsh are configured by editing small
snippets of XML and importing them. It would’ve been great with a more
interactive configuration option for newbies like me unfamiliar with the XML
configuration structures of libvirt. At least there are relaxng schemas that
detect invalid structure of the XML automatically.
Whispers off the internet told me I wanted to create an XML file specifying
the bridged network setup which is tied to the br0 bridge interface:
<!-- bridged-network.xml -->
<network>
  <name>bridged-network</name>
  <forward mode="bridge" />
  <bridge name="br0" />
</network>
This network can the be added/defined using the net-define sub-command:
$ virsh --connect qemu:///system net-define bridged-network.xmlInstall VM script
With all the network setup out of the way it’s time to grab the Home Assistant
OS disk image and create the virtual machine instance. Links to images can be
found from the documentation download page. For this setup we need the Home
Assistant virtual machine image for KVM (.qcow2) .
Once the image is downloaded it should be moved somewhere you would like to
store disk images. It’s convenient to create an install script that invokes
virt-install with all the specs for the guest VM because it makes it a lot
easier to tweak settings later.
#!/usr/bin/env bash
set -e
virt-install \
--connect qemu:///system \
--name hass \
--boot uefi \
--import \
--disk haos_ova-6.6.qcow2 \
--cpu host \
--vcpus 2 \
--memory 4098 \
--network network=bridged-network \
--graphics "spice,listen=0.0.0.0"After running the script the VM should be visible in virsh:
$ virsh --connect qemu:///system
virsh # list
Id Name State
----------------------
1 hass running
Connect to console using remote-viewer
Home Assistant is mainly configured using the Lovelace Web UI, but for initial
configuration and management the Home Assistant OS also provides the ha
command line. To my knowledge the guest does not run any SSH server by default
so the best way to reach the console is using some remote monitoring protocol
like spice or vnc.
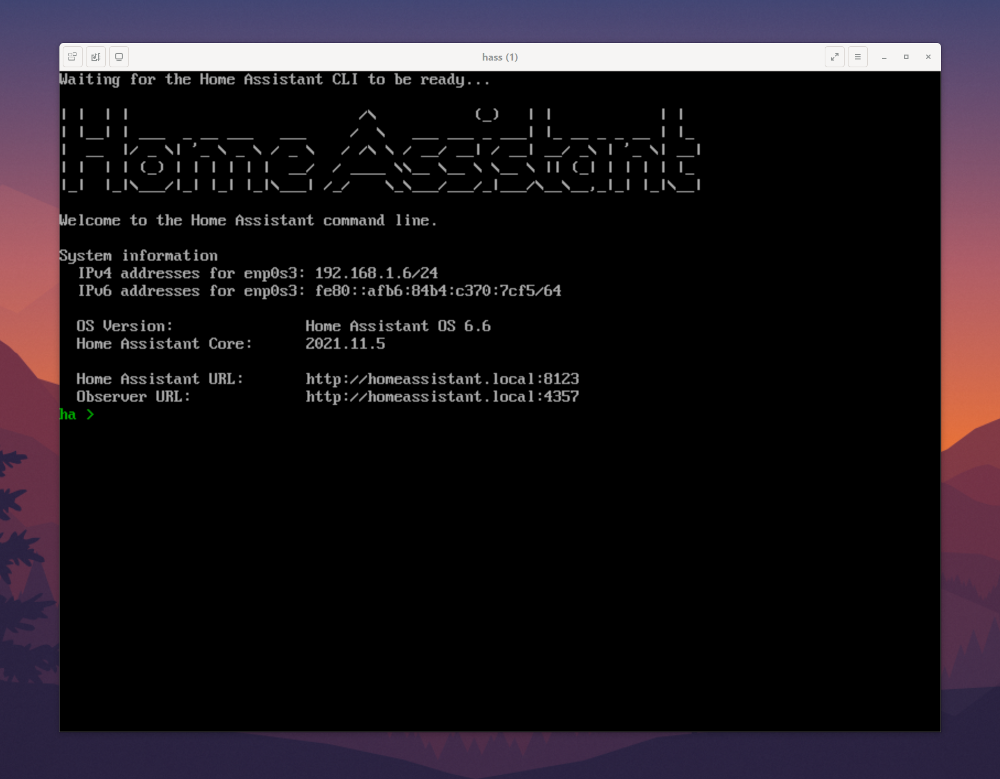
The install script configured the virtual machine with spice graphics which
can be viewed from a remote machine using remote-viewer:
$ remote-viewer spice://10.0.0.5:5900Hopefully you’ll be greeted with the first glimpse of your new Home Assistant VM!

One potential source of trouble at this point could be the NixOS firewall
blocking the spice port. Ensure to either open the port specifically or
disable the firewall entirely:
# /etc/nixos/configuration.nix
networking.firewall.allowedTCPPorts = [
  5900
];
# or
networking.firewall.enable = false;
Configure a static guest IP
It’s convenient to also configure the guest with a static IP to make accessing
the Home Assistant web UI more predictable. The ha command line can be used
to configure the virtual machine with a static IP on the bridged network:
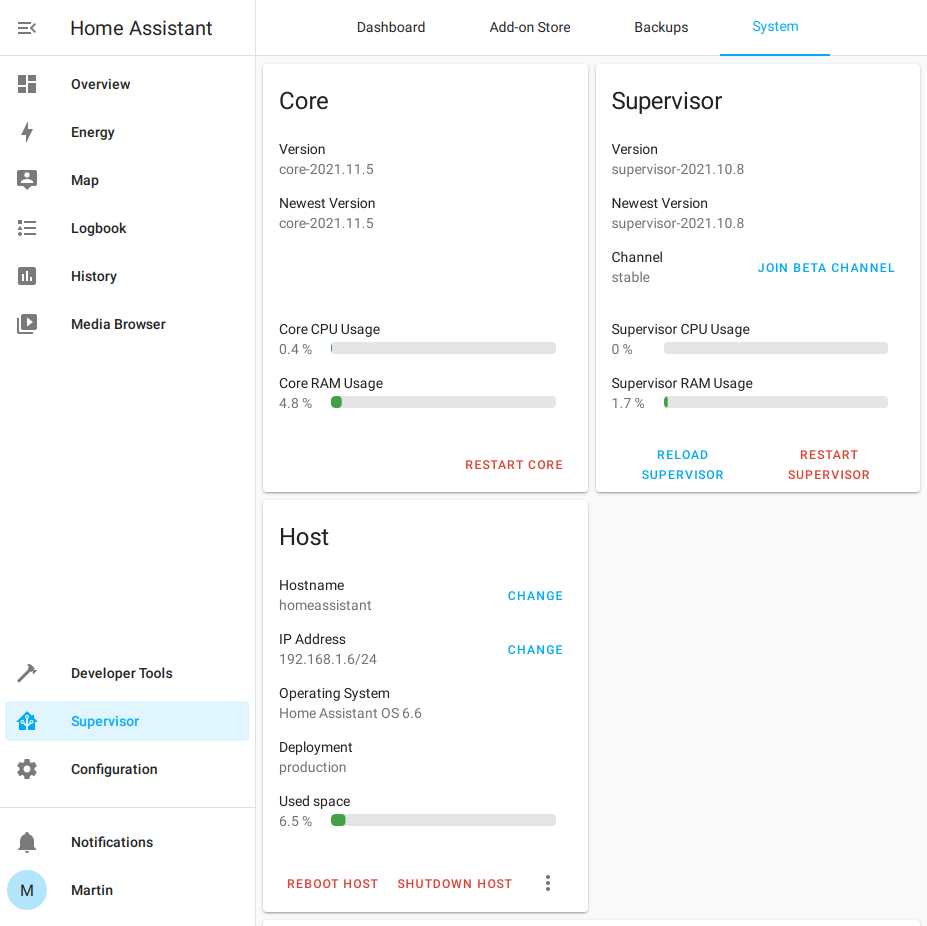
ha > network update enp0s3 --ipv4-method static --ipv4-address 10.0.0.6/24…and if everything has gone smoothly up to this point the Home Assistant web
UI should be accessible through the static IP on port :8123:

Bridge USB devices to the guest
An increasing amount of the devices in our homes are getting “smarter”. Basically that’s your toaster or dishwasher growing TCP/IP capabilities and getting intimate with your home WiFi. Yet in the era of IoT it’s comforting to know that not all devices speak the language of the internet and for numerous reasons1 other protocols are prevalent in home automation systems.
Two wireless communications protocols in wide use today are Zigbee and
Z-Wave. A WiFi adapter card doesn’t speak these alternative protocols and an
adapter must be used in order to integrate Zigbee and Z-Wave smart devices
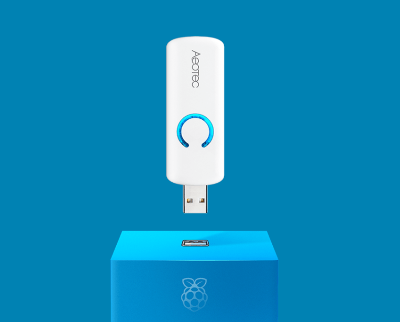
into a home automation controller. For the Raspberry Pi I used the RaZberry Z-Wave adapter card, which is a PCB specifically designed for the Raspberry
Pi. For the NUC I went with the Aeotec Z-Stick Gen5+ USB dongle:

Find USB device details
In order to use the dongle from the guest VM the adapter must be bridged from the host into the guest. In order to do that some product details are required.
List existing devices using lsusb:
$ lsusb
Bus 004 Device 001: ID 1d6b:0003 Linux Foundation 3.0 root hub
Bus 003 Device 001: ID 1d6b:0002 Linux Foundation 2.0 root hub
Bus 002 Device 001: ID 1d6b:0003 Linux Foundation 3.0 root hub
Bus 001 Device 002: ID 0658:0200 Sigma Designs, Inc. Aeotec Z-Stick Gen5 (ZW090) - UZB
Bus 001 Device 003: ID 8087:0026 Intel Corp.
Bus 001 Device 001: ID 1d6b:0002 Linux Foundation 2.0 root hub
Find the desired device in the list and note the vendor and product IDs, the
numbers joined by a single : and no whitespace.
Bus 001 Device 002: ID 0658:0200 Sigma Designs, Inc. Aeotec Z-Stick Gen5 (ZW090) - UZB
E.g. for the Aeotec Z-Stick Gen5+ the vendor id is 0658 and the product id
is 0200.
Write an XML file with the device setup
Create another XML file with the following structure and fill out the vendor
and product tags for the specific device:
<!-- usb-device.xml -->
<hostdev mode='subsystem' type='usb' managed='yes'>
  <source>
    <vendor id='0x0658'/>
    <product id='0x0200'/>
  </source>
</hostdev>
Attach the device to the guest by invoking the attach-device command with the
XML file path:
$ virsh --connect qemu:///system attach-device hass usb-device.xmlConfiguring Home Assistant
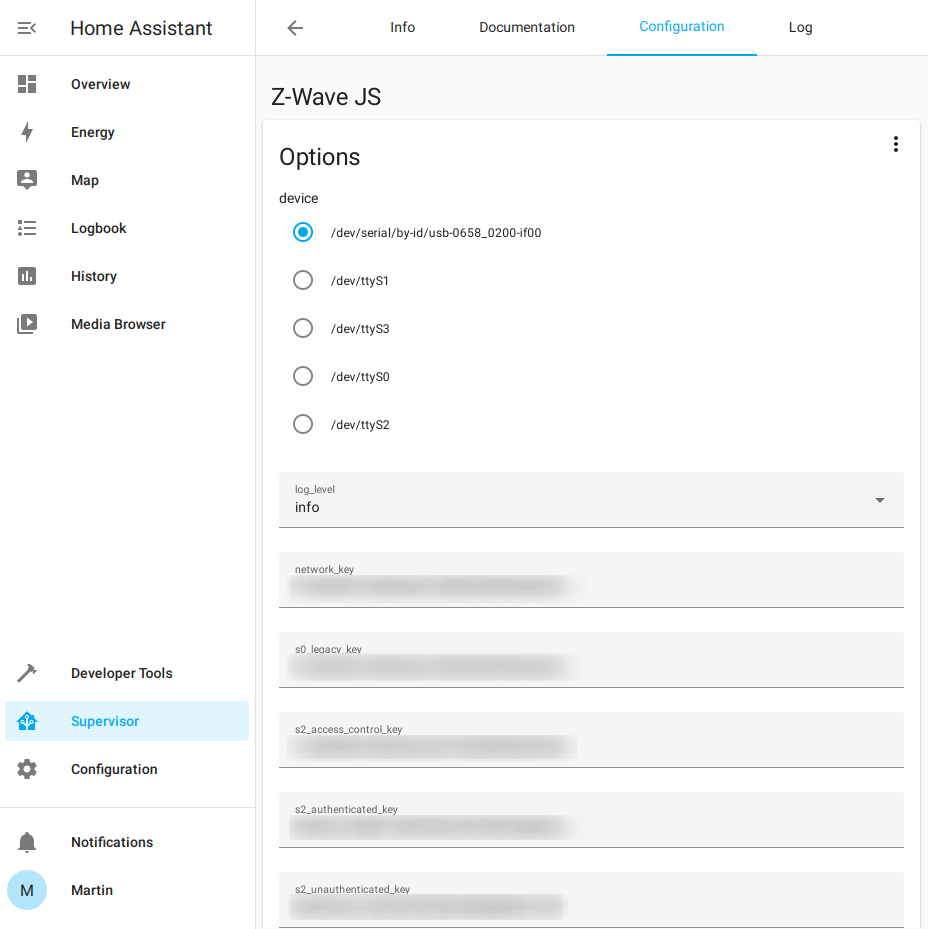
A Z-Wave add-on is required for Home Assistant to be able to integrate with
the Z-Wave dongle. The old OpenZWave add-on is deprecated and it’s
recommended to use the Z-Wave JS add-on moving forwards. Installing and
configuring the add-on is quite straight forward. Selecting the “Supervisor”
sidebar item and then “Add-on Store” it’s possible to use the search bar to find
the Z-Wave JS add-on.

For certain devices like the Aeotec Z-Stick Gen5+ Home Assistant is able to
automatically detect the dongle making configuration simpler. Otherwise I guess
it’s just a matter of finding the /dev device path for the configuration.
Summary
At this point I’ve got the Home Assistant OS running in a VM on an Intel NUC
just as I planned. What remains is to start migrating and setting it up with a
similar configuration to the Raspberry Pi.
While in the end the steps to setup the Home Assistant VM were actually quite
few and simple the road to get there was bumpy. One of the things that really
did trip me up was getting the network configuration right. Once the right
combination of NixOS options were set and some tweaks to the libvirt bridged
network configuration it all just suddenly worked and I’m super pleased with
that.
Virtualization is great when there’s not a need for superior performance. The
power of the NUC has no trouble running the Home Assistant VM while being host
to various other simple tasks. What remains now is to port over the actual
Home Assistant configuration from the Raspberry Pi. With the Pi freed of its
current duty I have other plans for it to serve a purpose in the home.
Footnotes
WiFi isn’t the most power-friendly protocol, so battery lifetime is improved greatly with
Z-WaveandZigbee. And honestly, why’d you even want your toaster on the internet?↩︎
